Sunday, June 3, 2012

Electrolysis rust removal

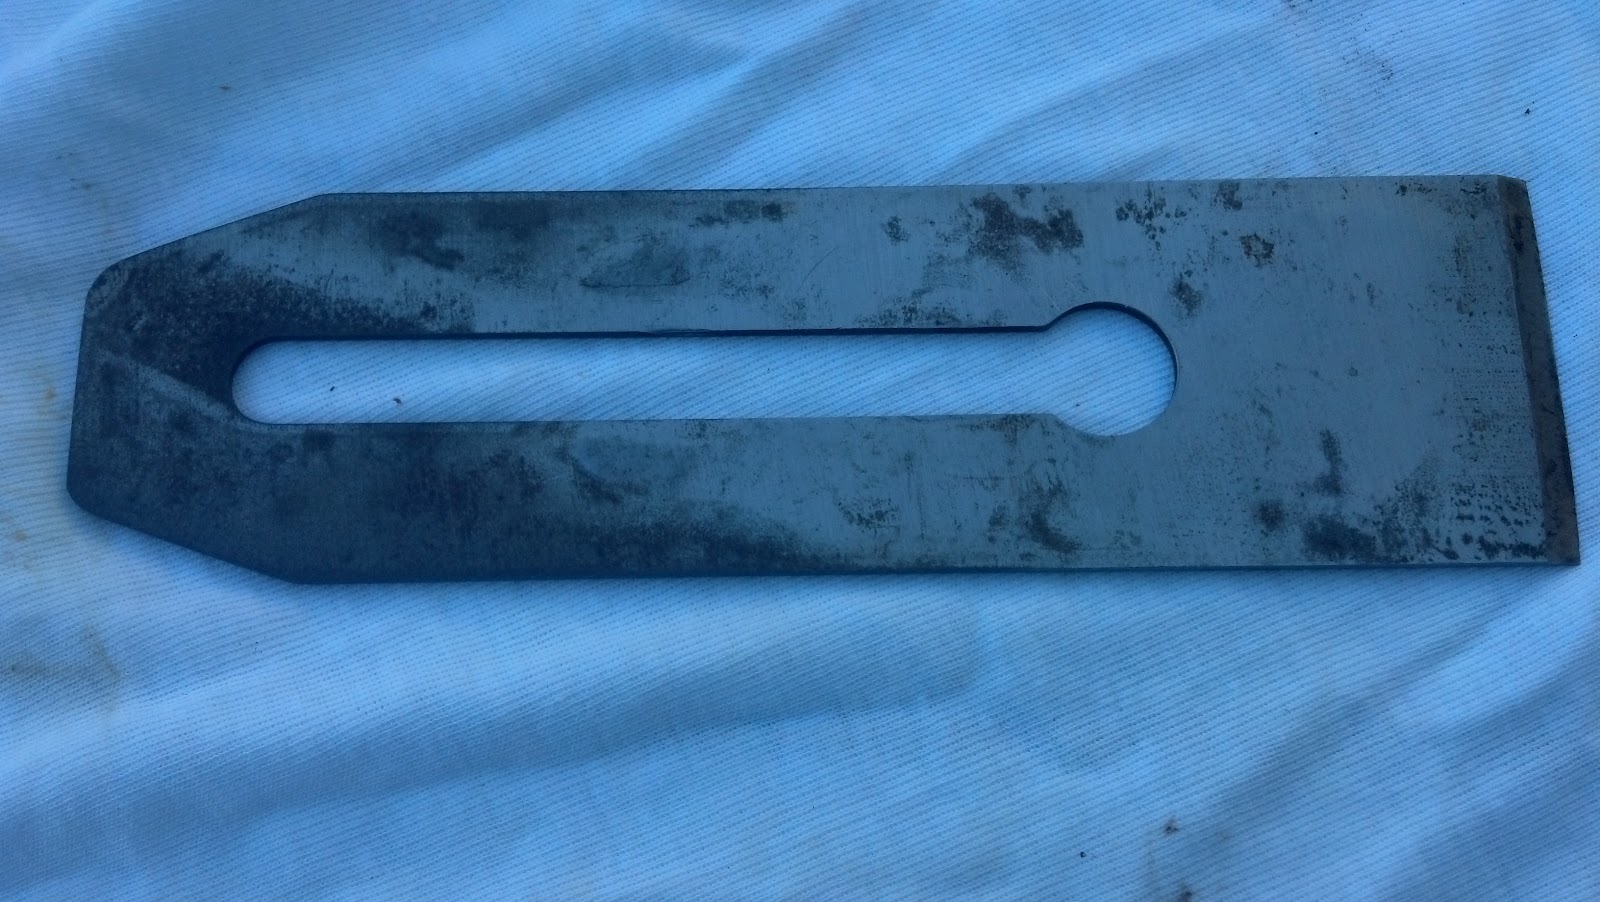
I took this hand plane from my Dad's garage. I think it belonged to my Grandfather, but I am not certain.


As you can see, it is a tad rusty, and the sole is covered in what looks like paint.

Once the plane is dismantled I see there are a bunch of parts that need some attention.

I've been reading various articles and wanting to try to use electrolysis to remove the rust.  Today the weather is beautiful, the kids have nothing on the schedule, and it seems I can spend the day taking care of this old tool. I've scanned a few instructions for performing this task, so this is more a report on how well it worked, rather than a how to.  For instructions you should check out the video on Woodworkers Guild of America, plus the detailed instructions, Mr. Vondriska does a nice job presenting the process, and has the idea of using a coffee can for the anode.  Instructions from Make: Magazine's project's blog by "Stan the Toolfool" and an article from Rick's Woodshop Creations.  After reading up on the process I was ready to get started.

Fortunately I have a neighbor who does a lot of car work and was willing to lend me his battery charger (thanks, Jeff), and a neighbor who has laundry soda (thanks Teri).  With leftover wire from the electromagnet experiment at the last science birthday party, a 6 gallon bucket, and an old coffee can we had laying around, I had everything I needed.

To make the anode I cut the coffee can in half to make two half cylinders.  I drilled 3 holes in each side and re-connected the pieces with wire.  I did this to give myself more room for the tools.  Since the plan is a No. 5 I had to use the 6 gallon bucket, plus this expanded anode, to make room.  That process probably took the longest, as I was using 14ga wire and wearing gloves so I didn't lacerate my hands on sharp can edges.  I also put a hole on either half at the top and wired up the leads there.


Checking the fit before filling with water/soad ash solution.
 
I first did the blade, half of which was covered in surface rust.  I mixed the soda ash in the water, put together all the pieces, and suspended the blade.

As soon as I fired up the charger I started seeing bubbles.  I wasn't getting 2 amps of current reading on the charger's ammeter, so I switched it up to the 6 setting.


After a while some sludge accumulated at the top.  I left the blade in for a couple hours.  I pulled it out a few times to check, it was pretty clear the process was working.
Mmmm, soup.

Sorry about my photography skills.  My worktable was now in the shade.  The black areas are where the rust was removed.
The body went in next. I was able to throttle the charger down to the 2 amp setting, maybe because this was a much bigger piece.  After a short while I took it out and was able to easily scrub off the paint from the sole, either because of the electrolysis or just from being soaked for a while.  This part seemed to get done very quickly, possibly the rust was only light on the surface.  After cleaning it up with a quick scrub I have a nice, black, rust-free piece of iron.  Wrapped up by running the chip breaker through the process.  I was going to do the frog too, but was worried about the adjustment knob being brass, and it is not in that bad of shape.

Everything got a light coat of machine oil.  The next phase is to sharpen the blade, chipbreaker, and lap the sole to flat.  I'm using a slab of marble with varying grits of sandpaper, I guess that is the "Scarysharp" method.  The sole looks good, with a few pits and scrapes that don't look too deep.  Hopefully it will only take a few hours of labor to straighten it up.

Monday, November 7, 2011

Jupiter Gazing

For the past few weeks I've noticed Jupiter hanging in the Eastern sky in the evenings from the front yard.  I keep telling myself that I'll get the old telescope out and see if it still works.  So, last night I actually did (in spite of the birthday party going on inside, 12 kids in the house is a good reason to hide in the yard.)  I have an old Meade Saturn reflector telescope, it's been sitting idle for years.  Found a few of the set screws are missing, and the equatorial mount is a bit loose, but I was able to put it together.

Brought it to the side yard between the houses, a bit shadowed from the porch lights of the neighborhood.  Very few stars are visible these days in the Northern Virginia area, lots of light pollution combined with the hazy sky.  I didn't bother aligning the equatorial mount for the scope, and the spotting scope is off kilter (that's where the set screws are missing).  First I did some views of the Moon, trying to capture the edge where you can see some terrain relief.  I could play for hours viewing the Moon, something about it is fascinating, probably because I read too much Heinlein.  The twins braved the chilly evening to see what was going on and seemed to think it was cool.

I spent some time finding Jupiter, which would have been easier if I had bothered to set up the telescope correctly; also had to play around to remember which eyepiece to use when scanning.  When I finally found it and saw 4 of the moons lined up next to it I was unexpectedly excited.  I was able to get all of the kids to parade through and take a look through the eyepiece, which went well as long as they followed the rule for "no touching the telescope while looking through" (had to re-find Jupiter once.)

A couple of the kids said they could make out banding on the planet.  I figured that was just artifacts from the telescope being dirty or something, but later I looked again and I agree, I think we could actually make out some banding.  Without the equatorial mount set up right the planet would zoom across the view at higher magnification, so fixing the alignment would make it easier to keep in view and get some more detail.

So, has the stargazing bug bit me?  We'll see if I get the telescope out more often, fix the missing pieces, and figure out how to properly use it.  Anyone up for a star party this winter?

Saturday, October 29, 2011

Pumpkin Windows

A few years ago someone in the neighborhood had cool silhouette coverings for their windows - dead tree branches, a skeleton, maybe some other things.  They looked neat; either they were store-bought or the people at that house were much more talented than me.  We first did this a couple years ago, thought I'd post about it this year.

I thought that would be a fun project.  I have a big roll of brown paper from some other project, I think I got it from the paint section at the hardware store.  Marker, scissors, and tape, measuring tape, and we are off and running.

  1. Measure the window and cut the paper to size, try to cover the entire window.  I just painted the living room a few weeks ago, so I cut the paper small enough to tape on the window, rather than the wall.
  2. Materials
  3. Draw Jack-o-lantern face
As creative as you want.
May need to spread out where there is room.


 4. Cut out the face, as if you were cutting out a pumpkin (without the pumpkin guts, but with more risk of paper cut.)


Proper technique for cutting the holes out.

5. Tape up to the windows for the whole neighborhood to see


In the past I have cut out squares of colored transparent film, like the stuff sold at craft stores to wrap up gift baskets.  Tape orange film over the openings, so from the outside the pumpkin glows orange. Or, cut out an alien and use green.


Thursday, September 15, 2011

Floating Glow Display

We made an attempt at building the Floating Glow Display described on Make: Projects.  This was a fun build; of course, I had to make it harder than it had to be. Our idea was to make "U.S.A." in red, white, and blue.

For some reason, a long time ago I had bought a sheet of acrylic/polycarbonate, so I used part of that for the sign. The Dremel Trio made carving into the plastic sheet fairly easy, although I find the dept adjustment on the Trio a little difficult to fine-tune.
Jessie finishing up the engraving.  She was a bit nervous about it at first, then I think she had fun.


Wired up 3 LEDs to a 9V battery, with some resistors in the loop to keep from blowing it out (tested the circuit on a breadboard first).  Not the neatest wiring job, but some heat shrink tubing hides some of my sloppy soldering.  

A bit of Shapelock for a stand and we're done, here's the finished product:
And, with the lights off and the battery plugged in:


The blue LED gets pretty washed out by the white, it actually looks more colorful in the picture than in reality. I will have to find a lower intensity white LED for this build.

Now I have made something that I can bring to Maker Faire in NYC this weekend.

Sunday, July 24, 2011

Settlers of Catan

Just spent a lovely afternoon playing Settlers of Catan with the twins.  The age on the box says 10 and up, but they (at 8) seemed to do OK.  I think it helped dust off some simple math skills that have atrophied over the summer.

Probably the best part of the time for them was the bartering.  They loved trying to trade resources.  Also, the fact that their older sisters are going to be jealous that they didn't get to learn to play first.  A little sibling rivalry is icing on the cake.

Overall I can see why this game is popular.  I can also see why buying the add on pack could make the game go longer.  We spent a good 3.5 hours playing, although we had a learning curve to get through.  We had removed all of the pieces from the holders a previous evening (which took some time), and our external ring of ocean is slightly wavy, so the hex pieces don't stay locked in.  A good playing surface would make things a lot more stable.

Thursday, June 30, 2011

DIY Lava Lamps

Oil, water, food coloring, and alka seltzer: Lava Lamps - Summer Fun -

Looks like a great idea to add to the science birthday party list.

Tuesday, June 28, 2011

LDRB Party Report

Time flies, it has already been a week since the party.  Seemed to be quite a success, I think the birthday girl and her friends enjoyed it.  Water bottle rockets, Estes rockets, and a trebuchet throwing water balloons.  Quite an eclectic collection of activities.  It was a hot and humid day, so I think any water activities were well received.

Some assembly required prior to beginning the seige
First they assembled some Art Applwhite qbit and pyramid rockets.  As they were doing this I was trying to set up the Estes launch pad, however my ancient launch controller wouldn't work.  While I have a nifty Pratt Hobbies Go-box controller I purchased from Apogee I didn't have a working battery pack to hook it up to, and the car was parked in the lot too far away to reach.  Fortunately a friend showed up to watch the party and I put him to work fixing the controller (thanks, Brett).

I had some of the girls assemble the trebuchet.  I think they enjoyed hitting things with the rubber mallet the most.


After some practice they were able to get some good distance out of the water balloons with the trebuchet.  I had initially tried some small balloons (sold as "water bombs"), but they were too fragile.  I used some full size balloons filled to the size of a softball with water.

            
Fire!

Target's Eye View
And yes, we all spent some time picking up balloon and string pieces from the field.

The water bottle rockets were a big hit, particularly the overhead launcher.  Here are some pics.
Party Favors!
Custom design takes flight
Splash up?
Once we got the Estes launch controller working we were able to do a few launches.

The Art Applewhite rockets flew surprisingly fast and high (A10-3T motor)!  The girls didn't do a great job gluing the tops (as the instructions stated), so the parachute charge blew through the top.  However, they had a great time with the first flight.  I will definitely use these again.
Launching a qBit
We also launched the Estes Oracle, and older model rocket that has a video camera in the nose.  Launched these on C motor.

Great shot of the Estes Oracle on launch


We launched Big Bertha and the BLU using B6-4 motors.  Both were good launches.  The kids enjoyed trying to catch the bomblets that came out of the BLU.

While I was picking up the motors from the hobby shop I impulse purchased an Estes ready-to-fly kit, the "Summit".   The rocket is surprisingly tall, given it comes in a box ready-to-fly.  The body is two equal length tubes, and it flew nicely.  If I had been more on top of things we would have set up to measure height of launch, but things were moving too quick for me to keep up.

Overall I received good reviews from the party.  A few technical glitches we were able to overcome.  The birthday girl seemed to enjoy herself, which is what it was all about, right? (no, not about me at all...)